Seating Plan
Seating Arrangement refers to the systematic organization of seating for students during examinations, lectures, or other academic activities. This arrangement is crucial for maintaining order, ensuring fairness, and optimizing space utilization.
The seating part section specifically deals with the allocation and management of seats for students:
-
Seat Allocation: Assigning specific seats to students to avoid confusion and ensure that each student has a designated place.
-
Seating Plan Creation: Developing a layout that details where each student will sit, often considering factors such as roll numbers, alphabetical order, or specific requirements.
-
Monitoring and Adjustments: Ensuring that the seating arrangement is followed during the event and making any necessary adjustments to accommodate changes or special needs.
Viewing
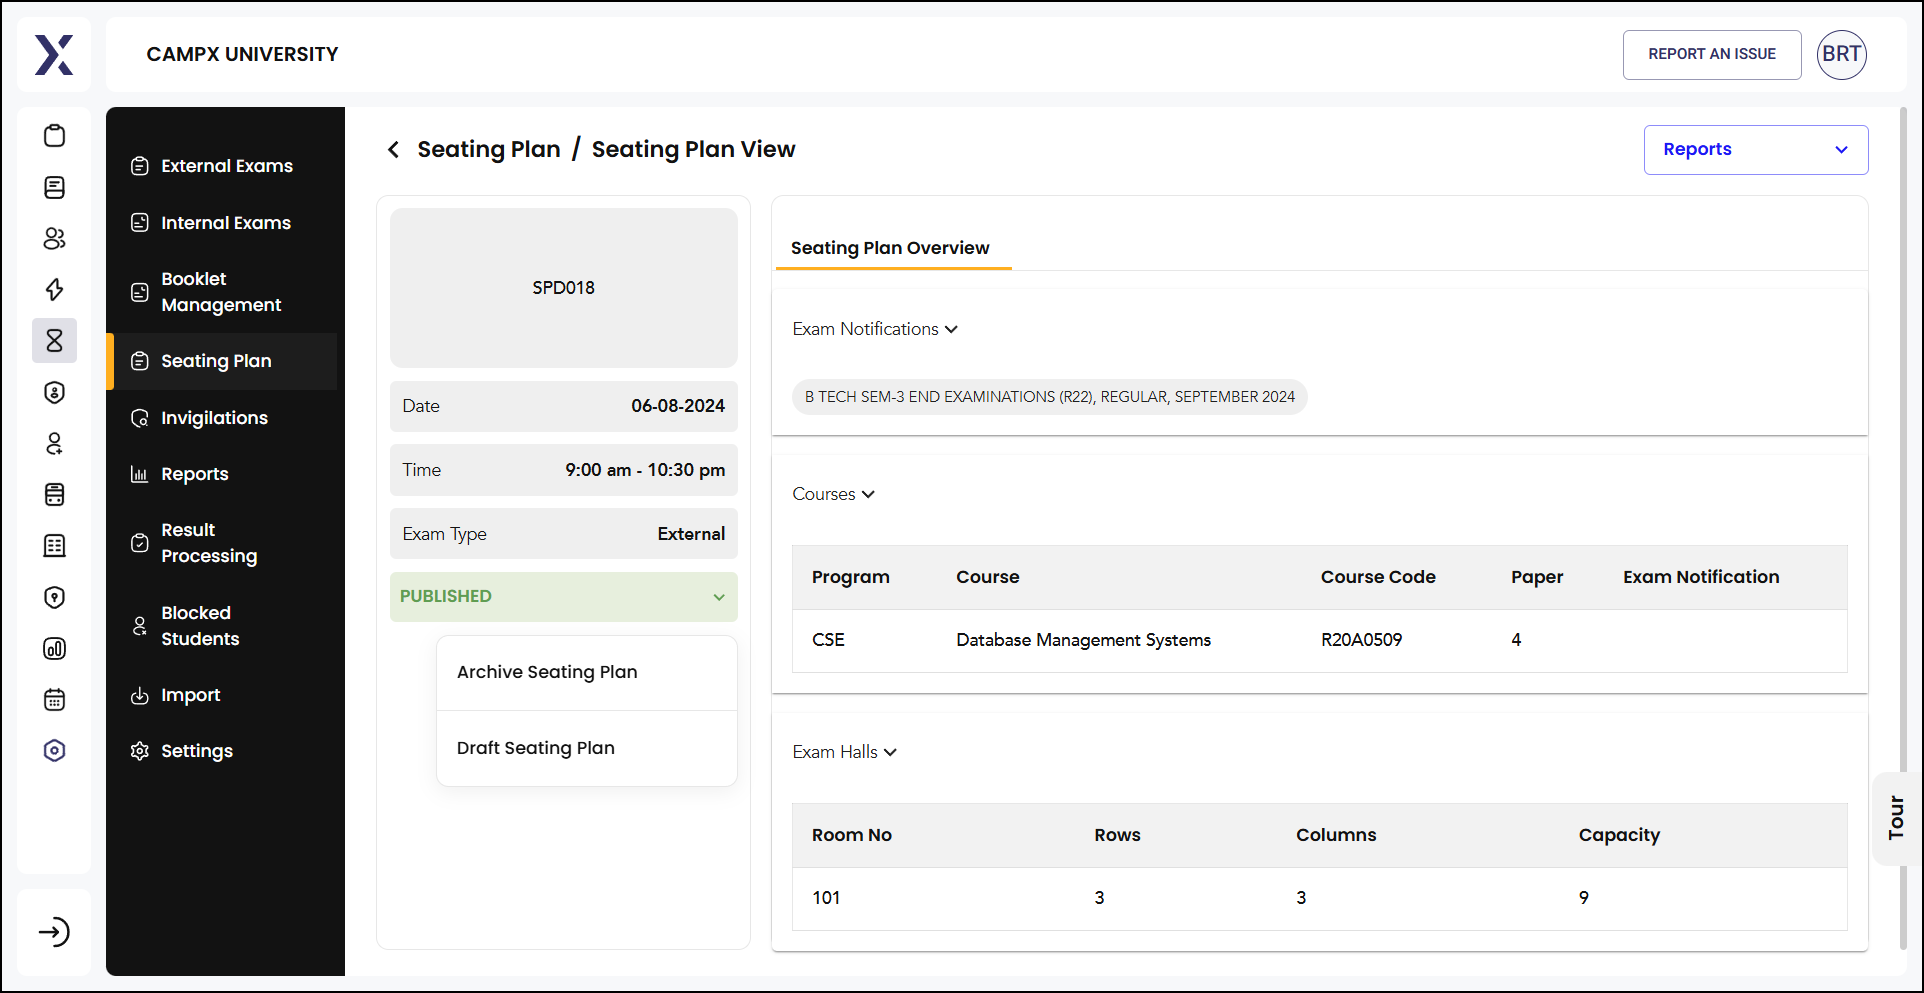
Upon clicking View icon in the seating plan management interface, you can access the detailed seating arrangement for the specified exam. This interface allows administrators and exam coordinators to ensure that all students have a designated seat, which helps maintain order and fairness during exams. The seating plan can be tailored to accommodate various factors such as roll numbers, alphabetical order, or special requirements.
Here's a brief overview of the seating plan interface features:
-
Seating Plan Overview: Displays the details of the exam, including date, time, exam type, status, and specific notifications for the course and program.
-
Exam Hall Details: Information about the exam hall, including room number, number of rows and columns, and total capacity.
-
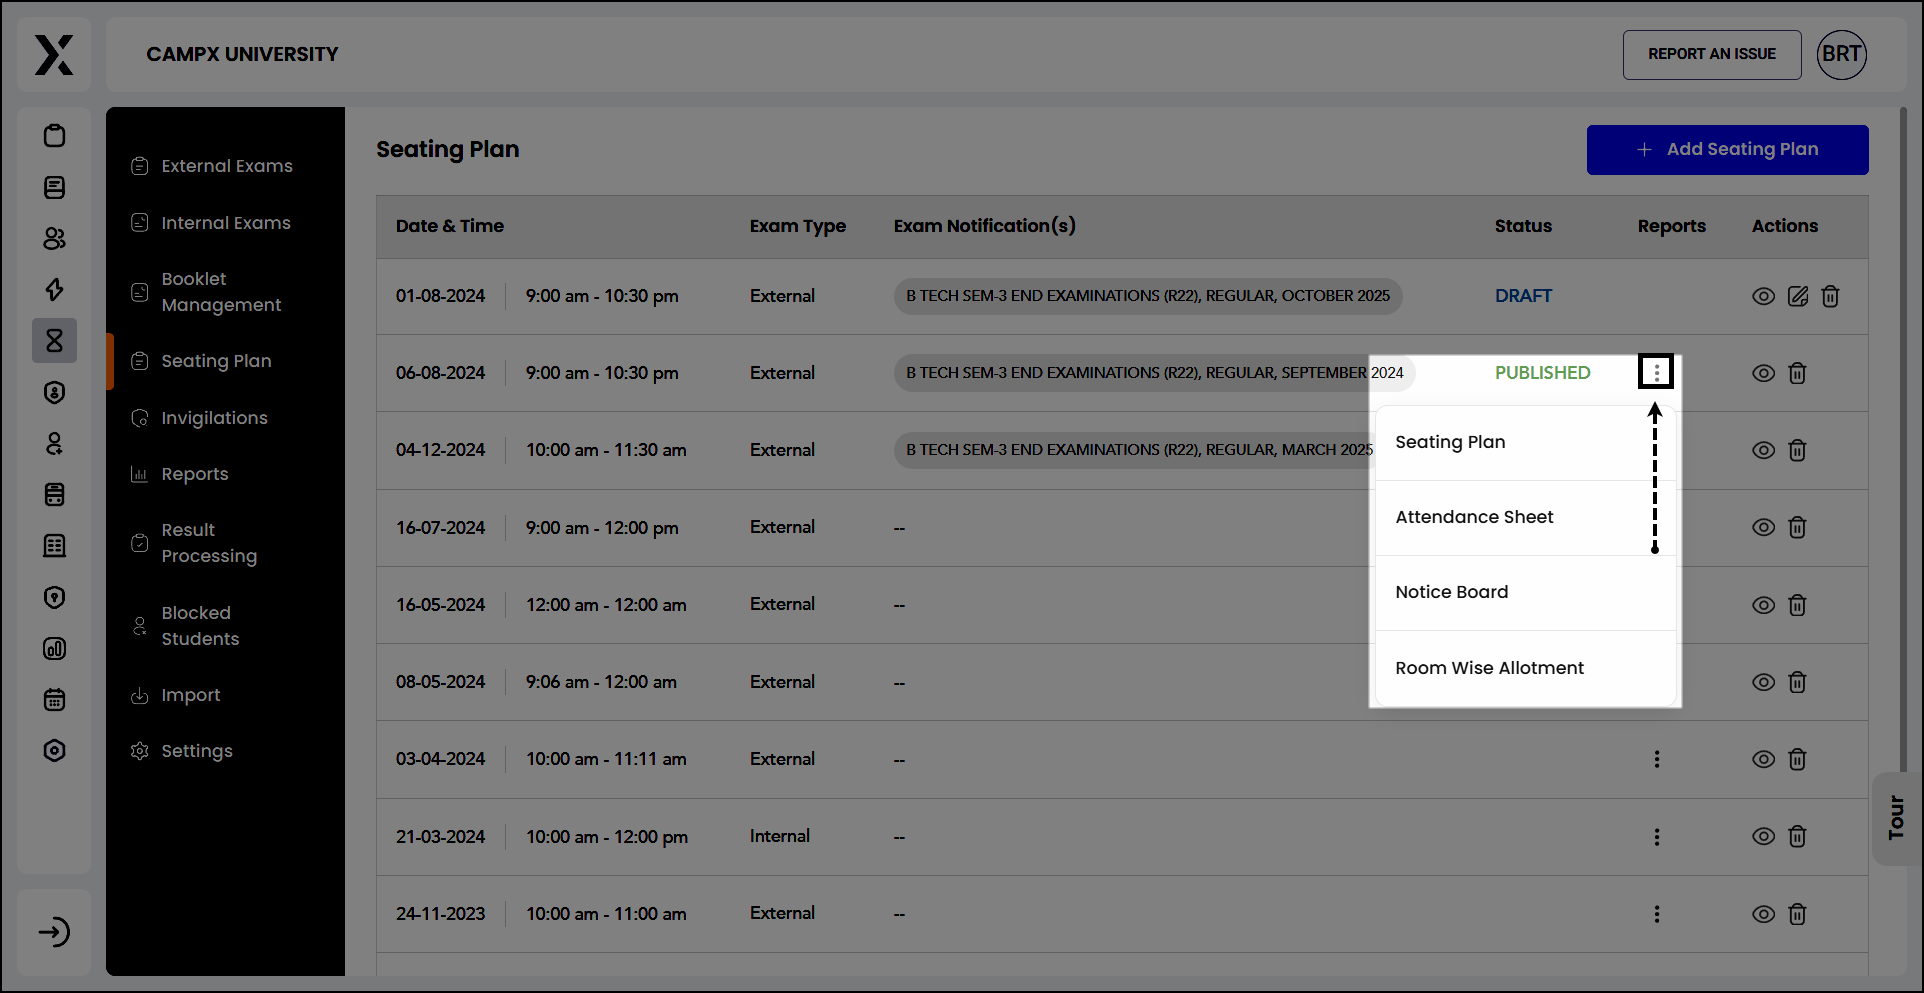
Reports: You have the facility to generate various reports, such as the seating plan, attendance sheet, notice board, and room-wise allotment. Select the report, apply filter(s), and click on 'Get Report.' Reports can also be generated by clicking the
kebab (three dots)menu against the seating plan record. Both give same output. -
Draft/Archive/Publish Status: You may save a draft of the seating arrangement for future completion. One finalized, the seating plan is published for all to know. A plan may also be archived in history. This allows you to manage the seating plans more efficiently by archiving old plans and saving drafts for future reference.
Adding
You may create a new seating plan by clicking Add Seating Plan button located at the right top corner. Creating a new plan involves six major steps; this is to ensure everything falls into place and there is no chaos.
-
Step 1: Basic Details: Enter basic details.
-
Exam Date: Select the date of the exam. For example, the date is set to 01-08-2024.
-
Exam Slot: Choose the time slot for the exam. In the example, the slot is from 09:00 am to 10:30 pm.
-
Exam Type: Specify the type of exam, such as "External."
-
Click the "Save & Next" button to proceed to the next step.
-
-
Step 2: Exam Notifications: Set up notifications for the exam. This ensures that the seating arrangement is linked to the correct exam schedule and details.
- Specify which exam notification is relevant for the seating plan you're creating.
-
Step 3: Courses: This involves choosing the specific subjects or modules for which the seating arrangement is being created. This will make sure each student is allocated a seat according to their course.
- Select the courses that will be included in the seating plan.
-
Step 4: Exam Hall: Assign exam halls or rooms where the exams will take place. This will ensure that each student is allocated to an appropriate room, considering capacity and other logistical factors.
- Specify the locations and ensure they are properly allocated for the number of students.
-
Step 5: Seating Arrangements: Arrange the seating for students within the exam halls.
- This step includes assigning seats to students, ensuring proper spacing, and adhering to any specific seating requirements.
-
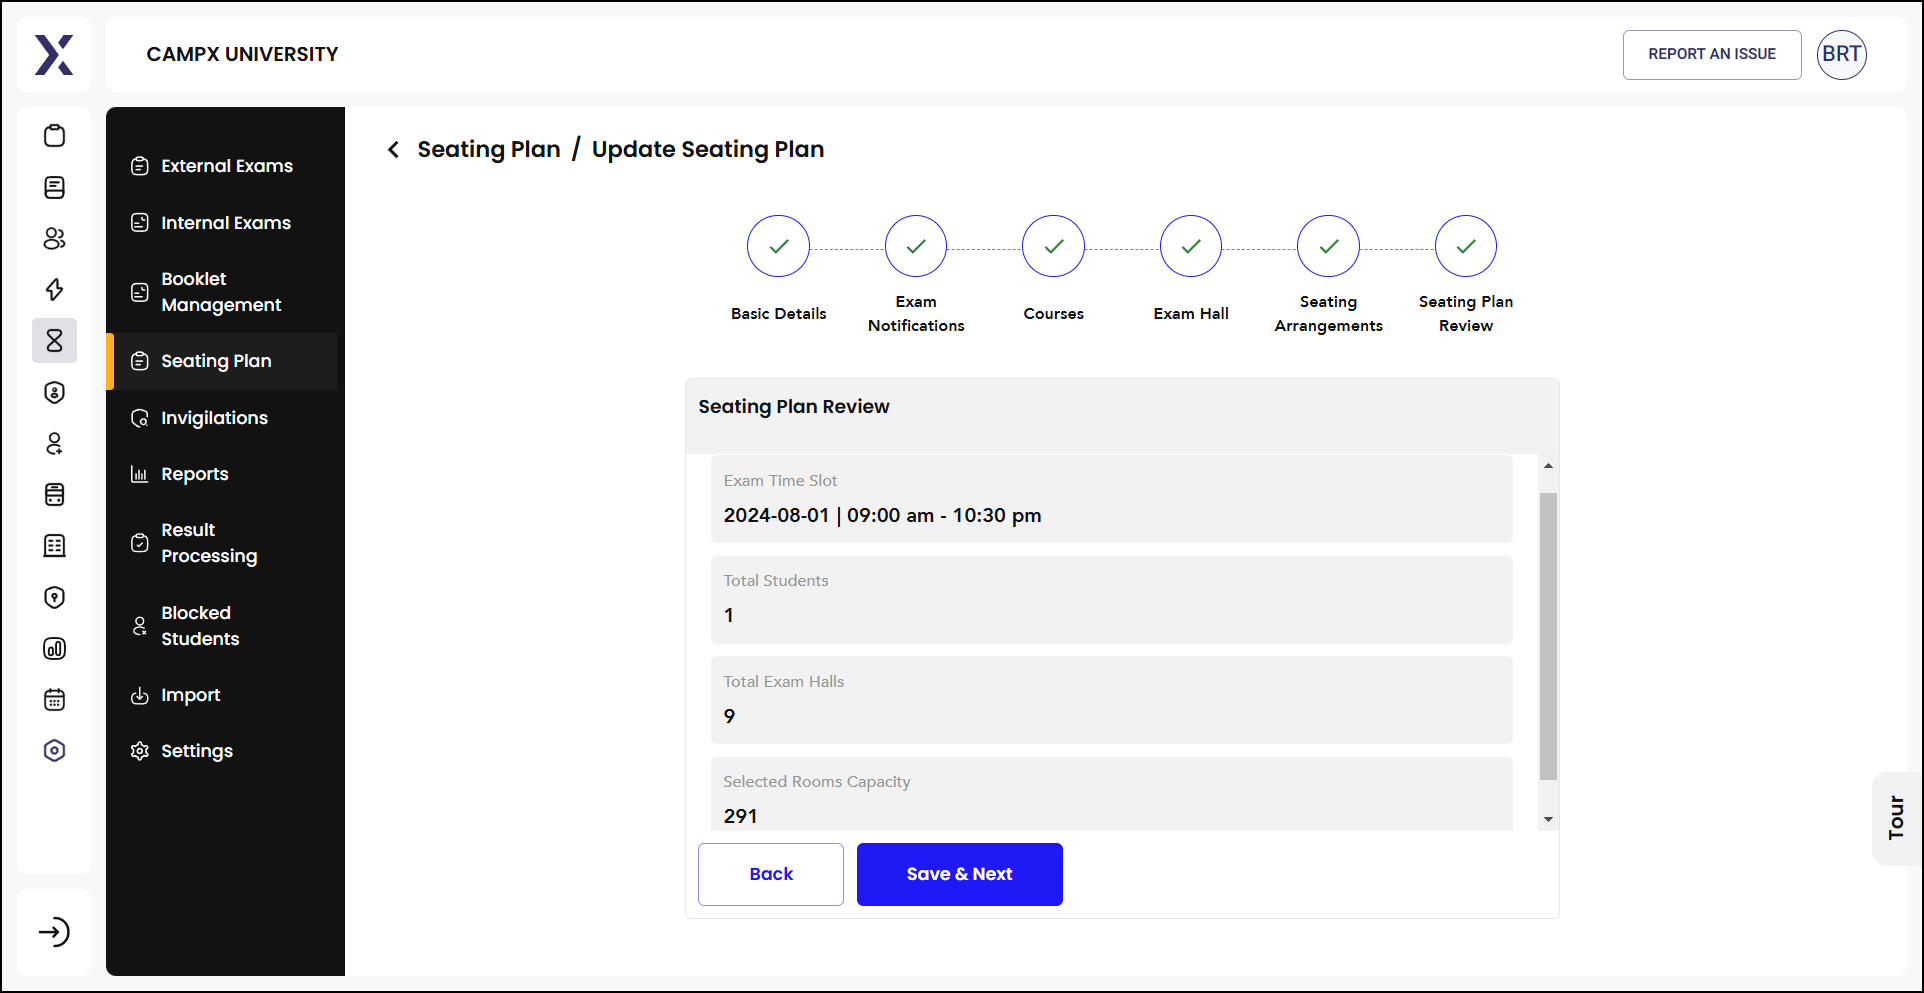
Step 6: Seating Plan Review: Review the entire seating plan to ensure all details are correct.
- Verify the exam date, time slot, exam type, notifications, courses, exam halls, and seating arrangements before finalizing the plan.
By following these steps, you can create an organized and efficient seating plan for exams.
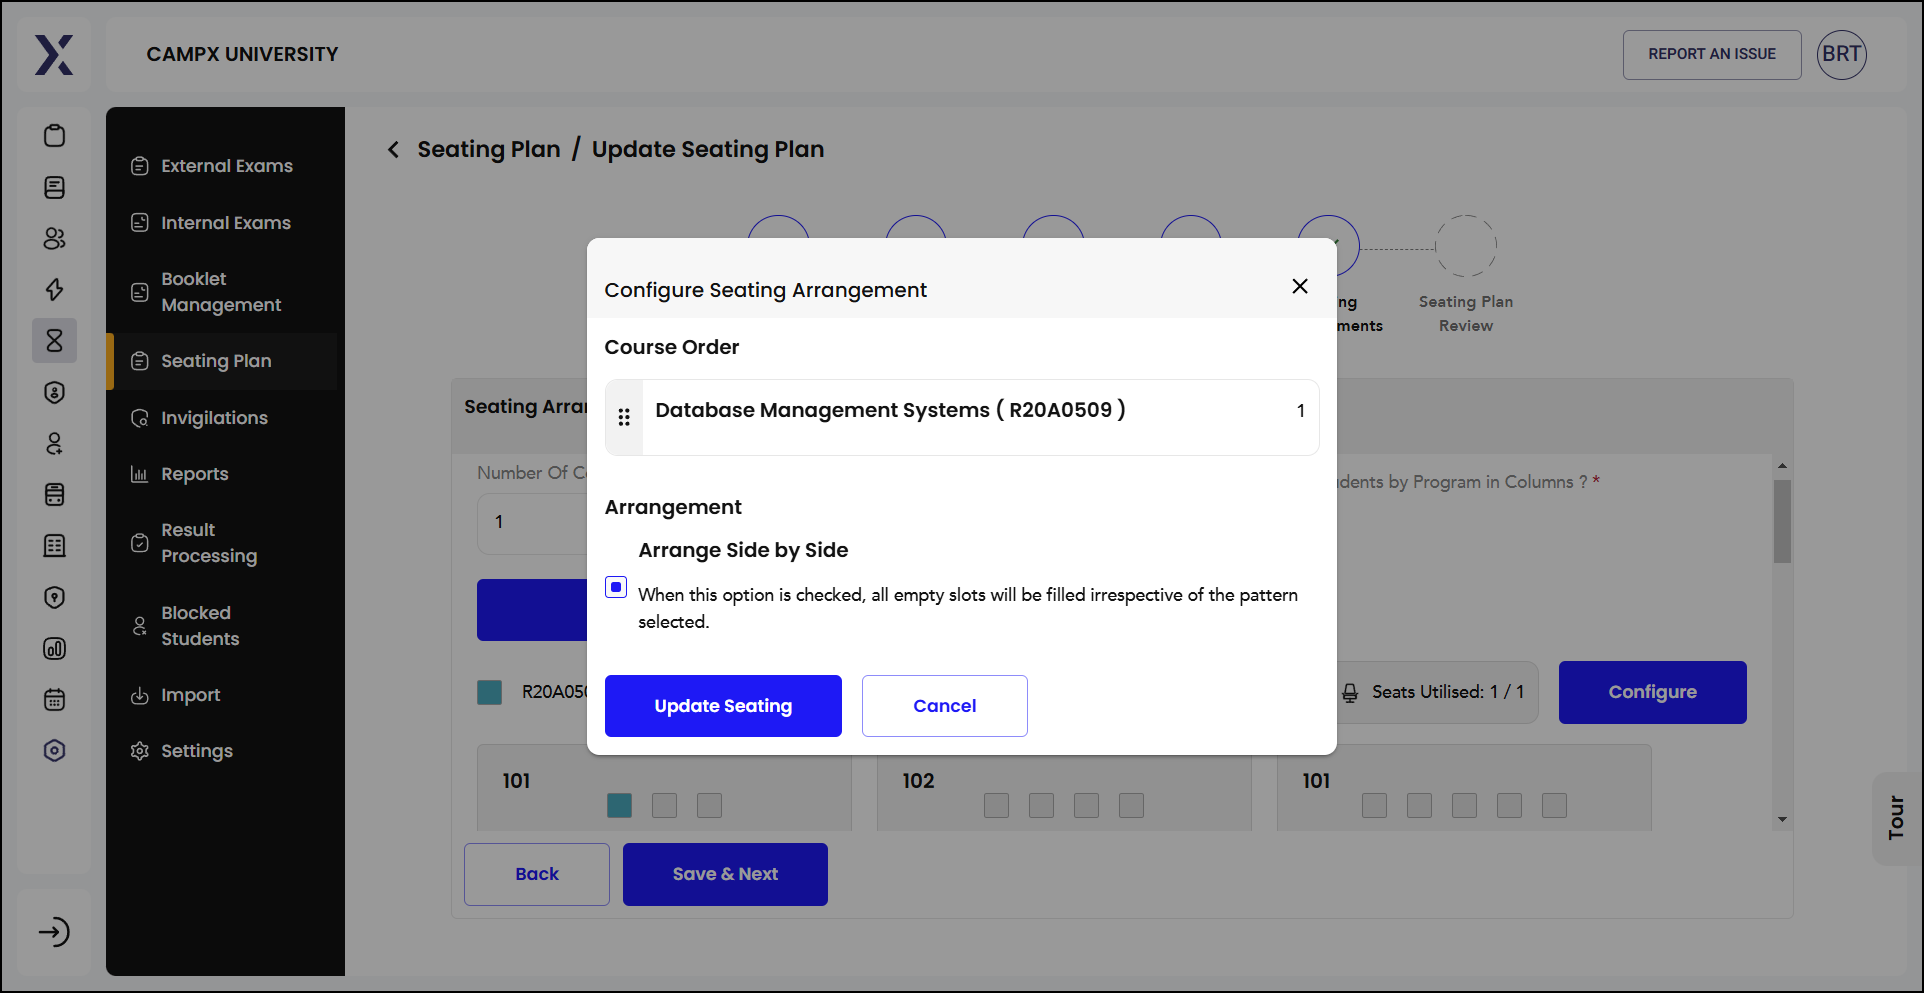
Updating
To modify an existing seating plan, click on the corresponding Edit icon.
-
Course Order: The course for which the seating arrangement is being configured (e.g., Database Management Systems (R20A0509)).
-
Arrangement: Options to arrange seats side by side or other patterns.
-
Modify Arrangement: Select the appropriate seating arrangement pattern. For example, the "Arrange Side by Side" option ensures all empty slots are filled irrespective of the selected pattern.
-
Save Changes: Once you have made the desired changes to the seating arrangement, click the "Update Seating" button to save the modifications.