Concessions
Overview
The Enrollment >> Concessions feature allows administrators to view and manage all student concession requests from a centralized location. This module provides a comprehensive list of students who have applied for fee concessions, enabling efficient approval workflows and transparent tracking of financial aid decisions.
Key Features
- View all concession requests from enrolled students in a single dashboard.
- Approve or reject pending concession applications with required documentation.
- Access detailed student fee information through integrated admission records.
- Export concession data for reporting and administrative purposes.
- Track concession status with clear visibility into pending, approved, and rejected requests.
Viewing Concessions
ℹ️ Use this section to review all concession requests and take appropriate actions on pending applications.
- On the left side of the main menu, go to Enroll → Concessions.
- The system displays a complete list of all students who have applied for concessions.
- Review the concession details including student information, requested amounts, and current status.
- To get details of all concessions availed, click on Concession Amount column View.
- Use the Export button to download the concession data in Excel format for further analysis.
Managing Concession Requests
Reviewing Student Details
ℹ️ Click on any Admission Number to access comprehensive student fee information.
- Click on the Admission No. of any student in the concessions list.
- The system opens the complete Student Fee Card with detailed payment history.
- Review all fee-related information to make informed concession decisions.
Processing Pending Concessions
ℹ️ For concessions with 'Pending' status, administrative action is required to approve or reject the request.
- Locate concessions with 'Pending' status in the list.
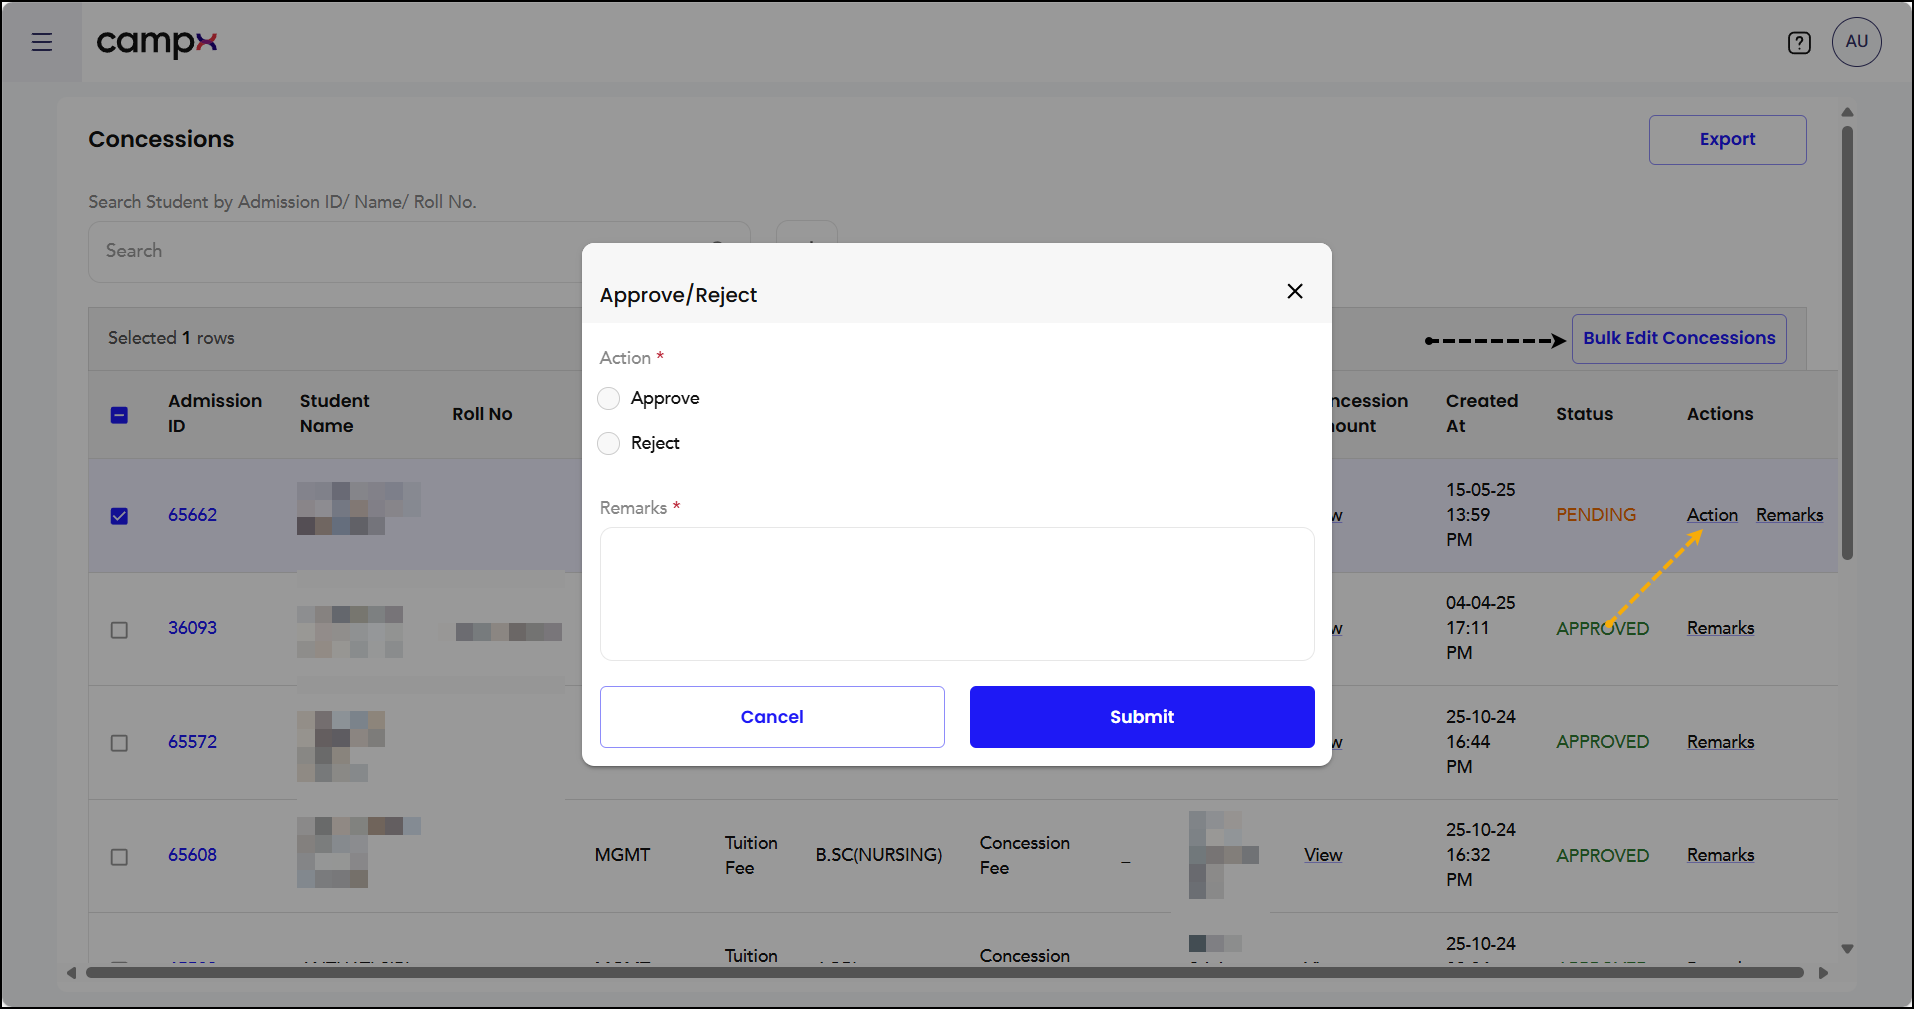
- In the Actions column, click on 'Action' for the respective student.
- Choose one of the following options:
- Approve: Select to grant the concession request
- Reject: Select to deny the concession request
- Fill in the Remarks field (Required) with clear justification for your decision.
- Click Submit to process the concession request.
- To Approve or Reject concessions in a lot, click Bulk Edit Concessions.
- The concession status will automatically update based on your decision.
Viewing Concession Comments
ℹ️ Access detailed comments and history for transparency in decision-making.
- In the Actions column, click on 'Remarks' for any concession entry.
- Review the expanded section showing all comments related to the concession request.
- This provides complete context and history for informed decision-making.

Common Issues & Solutions
| ❗ Issue | ✅ Solution |
|---|---|
| Concession status not updating after approval | Refresh the page and check if the action was properly submitted with remarks |
| Unable to access student fee details | Ensure the Admission Number is correctly linked and try clicking again |
| Export function not working | Verify you have the necessary permissions and try again |
| Action buttons not visible | Check if the concession is already processed or if you have admin permissions |
Useful Tips
💡 Best Practices:
- Always provide detailed remarks when approving or rejecting concessions for audit trail
- Review the complete Student Fee Card before making concession decisions
- Use the Export feature regularly to maintain offline records
- Process pending concessions promptly to avoid delays in student fee processing
✅ Do's:
- Verify student eligibility before approving concessions
- Document reasons clearly in the remarks field
- Cross-reference with admission records for accuracy
⚠️ Important Note: Concession management setup is handled in Payments → Academic Fee → Student Details → Concessions → Applicable Concessions → Add Concession. This enrollment section is specifically for reviewing and approving existing concession requests.
Support
Need Help?
Access Support Portal from the footer and click on "Login with CampX."